Showing posts with label DIY. Show all posts

Friday, August 2, 2013

Documenting my school year. ( D.I.Y Project)

       Hello, guys! I am so excited excited to share this Back to School D.I.Y project with you, it's extremely easy, recyclable and cute, and it takes under an hour to complete! Im going to be completly honest and say when i pulled out all my crafty tools I had no idea what the heck I was going to make,and I didnt really know what it is until now. Okay, As we all know Summer is coming to an end "BOOO!" but I have a fun way to make this upcoming school year fun "Yayyy!" How am I going to acomplish that? Well with this super easy project you havea cute vintage way of documenting the upcoming year! No more talking, Let's Begin!


You Will Need:


  • A bottle! I used the Arizona Iced Tea bottle (NOT CAN, NOT GALLON) for its vintage look. 

            - I do know that not every one owns this particular bottle so heres a list of substitutions
                       ° Gosh, forgot the name! But y'know thoses tall water bottles, that have that unique top, those are great!
                        ° Gallons, but not those huge wide vast ones!
                           ° Any cute water bottle, you think will work, your the artist! :)


  • Cupcake liners! I used the paper inside the foil liners their cute and glittery! And go great with the vintage look!

            - Pretty paper, or Reeses peanut butter cup liners can work! And if you dont have those regular paper, or magazine paper can do. Even some sort of cloth!

  • Soda tabs!

         - Okay, if you have no soda tabs, use pretty rocks,marbles,pebbles,rice the whole point is some vintage chic vintage vintage center piece.

  •      A knife!

                   - You need a knife, scissors won't do, unless your using a skinny flimsy bottle, which I frown upon for this project!


  • Glitter Glue!

        -This is not a neccesity but I think it adds to the flare of the project. You can use markers or regular glue and sprinkle rice or something of those sorts.

  • Paper!
  • Elmers Glue!
  • A paint brush, if you own one
  • A quote or picture of something, or someone you like.


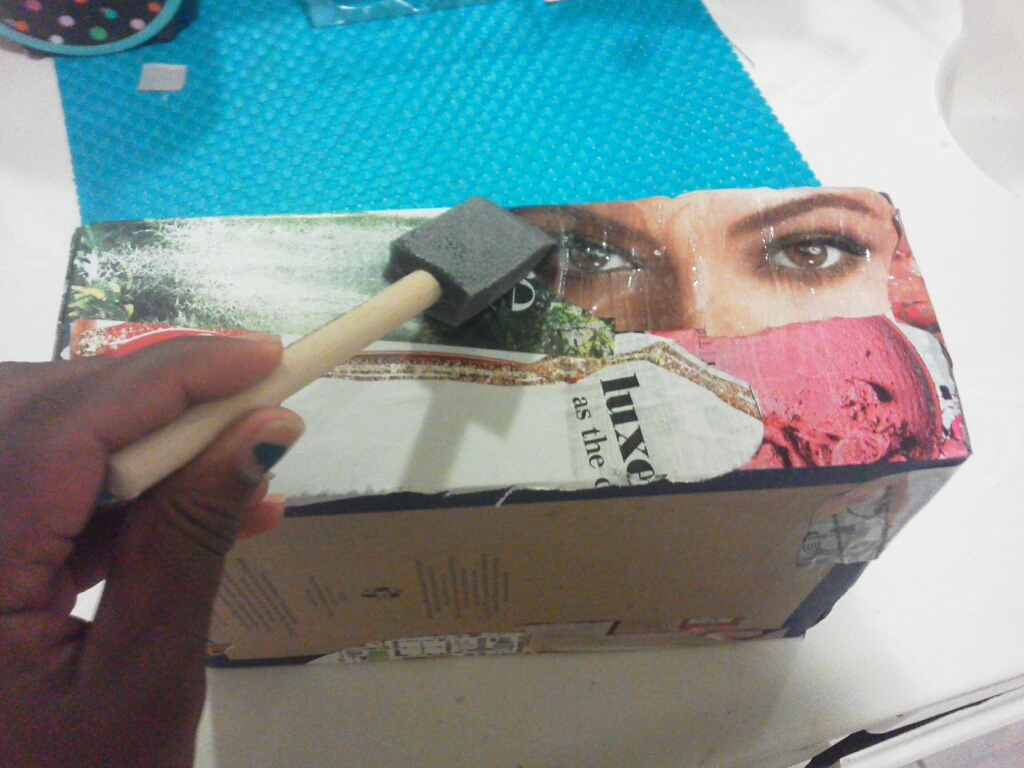
Step 1 - Have all your materials in an arms length infront of you,organized and not cluttered. Using you cupcake liners (or a different substitution) and slowly, and neatly stuff
it in the opening opening of your bottle. (Shown in the picture above.)


Step 2 - Fill the cupcake liner with soda tabs, or pretty rocks,marbles,pebbles, rice, whatever suits you.


Step 3 - Cover the soda tabs (or other substution) with glitter glue!


Step 4 - Using a knife, find the center of your bottle close to the top and create a crescent. Do this slowly and neatly, do your best not to cut yourself. Make sure its wide enough and is able to open and close,

"Today we decide how tomorrow
will look" 

Step 5 - Find some paper, that's the size of the front label of your bottle (magazine paper,decorative paper, or simply plain paper will work) you can either print your favorite quoye of inspiration on the bottle. Or do what I did and find another paper to glue on top of the other. I also found that a favorite picture can suffice. To glue this down to your bottle use modge podge (Water downed glue)

Step 6 - Glue the paper down over your label so it is hidden. Do this with your quote and/or picture.

Step 7 - Decorate the paper with markers, or whatever your choice to spicin up the plain paper (if plain)


Step 8 - Your cupcake liner shouldve had time to mold into the shape of the cap so pull it out and using regular liquid glue place a thin line all around and place it back in the opening

I found that it only takes overnight for the entire thing to dry! So by the time school starts you can begin filling
This is how the final product should look like! Well, this is how
my final productlooks like. If yours does not look the same thats alright.
Everyone's looks different  
your bottle with little notes of the best part of your day, notes between your friends, and coins you can use for next year! I love this odea, I think every gal should make one, ITS SO EASY!


 So if you decide to make this and it came out differently then mine in some way, post it inthe comments below! Also, if my picture s and steps didnt make sense and you really want to make this project either email me ( authorwriter1d@gmail.com) or comment your questions down below :)

~ Ony

Tuesday, June 25, 2013

Jewelry Box

    Okay, here you go another Do it Yourself tutorial! This one is making your own jewelry box, mine sadly breaking. And is too small, to hold all my perty accessories. So i decided that, i should share how i made this  box with you lovely people :D

You will need :

  • ModgePodge ( or Watered down Glue) - Mandatory
  • Some sort of brush for the modge podge - Mandatory
  • Container/Bowl to hold your watered down glue - Mandatory
  • A shoe box ( Any size, you want) Make sure it has a lid! - Mandatory
  • Boxes. ( Cereal boxes, chapstick boxes, perfume boxes, any kind of small boxes.) - Mandatory/Optional
  •  Nude Toilet Paper, rolls. - Mandatory/Optional
  • Scissors - Madatory
  • Hot Glue Gun, or duct tape, or anything to get it to stick. I highly recommend a hot glue gun,tho - Mandatory
  • Magazines! Preferabbly, ones you no longer read...- Mandatory
  • Marker of an sorts - Mandatory
  • Decorative Paper - Optional
  • And your creativity :D
Note: If you do not have any of these materials, i listed. Try to compromise! This is where being creative is very much needed. Also,   you can use, either boxes or nude toilet paper rolls. Or in my case, BOTH!

Step 1 -Find all your materials. Make sure they are with you all handy. Place your boxes in your shoe box, according to how you want the inside of your jewelry box to look like :D


Step 2 - Remove, boxes one by one, and trace its outline on the bottom of the box.
.

Step 3 - Decorate your box! With your old magazines, cut out random strips, and use modge podge (watered down glue) to apply to box. Do this until the entire box is covered in magazine strips.
Note: The box looks way better is you cover the strips with strips. Like is seen in picture above/


Step 4 - Apply a thin coat of modge podge over the entire box. Let dry


Step 5 - While waiting for your box to dry. Cut off the unnecessary extra cardboard, so you have an opening for your jewelry!


 Note: When you cut off the edges and make an opening, the box may come apart. Just simply  glue, or tape it back together :D

 Step 6 - Cover your boxes in magazine strips, It's only necessary to cover the parts that will show
Step 7- Apply a thin coat of modge podge, only if you decided to uses magazine strips instead of decorative paper

                                            Step 8 - Glue down boxes, in your Jewelry box.
Violla, your done!

Did anyone find this tutorial, interesting? Follow me, and comment, to show your support for my blog


-Ony

Wednesday, June 19, 2013

Lemon and Sugar..... My New Bestfriend 2/2

What to do with left over Lemon and Sugar Scrub?

 HellO,guYS! Ony, here! My last entry was all about the fantastic beautiful lemon and sugar face scrub. Well, i discovered while applying it to my face that it tasted heavenly! And.... I was hungry. So i kept eating it :). But using my will power i forced myself to stop.
  This morning, however, i awoke craving pancakes! But i used the last of my syrup yesterday...So what to do? I've always been keen to squeezing lemon on my pancakes, ( It tastes amazeballs!) So, i thought hmm, how bout i just turn my delicious face scrub into....SYRUP! You'll need:
 The ingredients from the face scrub, ( In my scrub i didn't use honey, but i bet it'll still taste amazing!) + water, and butter!
 Find a small pot and place it on the stove. Find your face scrub and scrape it inside the pot. Add water just enough so the sugar dissolves. (Less water, thicker the syrup) Make sure the temperature on the stove is med-high. Stir the scrub and the water together. It should dissolve quickly, and get hot. So be careful! taste the mixture, if you like how it taste, mix in butter and serve. If not...Add more sugar! ENJOY!
 NOTE:
 This mixture may come out runny, so what it's still delicious. If you added to much olive oil in your mixture it might taste gross. Pour into a cup, and apply to pancakes. Or make lemonade by simply adding more water and ice cubes!

 UR WELCOME


Lemon and Sugar.... My New Bestfriend 1/2

    D.I.Y TIME! If you don't know,  D.I.Y stands for, Do It Yourself. Something i'm absolutely inlove with. I've done plenty of D.I.Y Projects, but i'm only going to share my most recent ones.
    Okay, so i have dry,bland oily skin. No one wants that at alll! So me being a d.i.y gurl, i google until i find something i can try a.s.a.p. Lemon and Sugar Scrub!  Since i am not responsible for this discovery i will leave a link to the web i got this from. Okay, this is what you'll need

  1. A fresh lemon, or organic plain lemon juice only! - ESSENTIAL
  2. Sugar! Or salt ( but salt is harsh to the face...) - ESSENTIAL
  3. Oil! I use Olive Oil ,  - OPTIONAL
  4. Honey! - OPTIONAL
  Okay, find a jar/container of some sorts. Make sure it's absolutely clean. I used an empty cream cheese icing container (yum!) Once, you have your container, fill it about 1/3 full of sugar. ( How much sugar varies on how often you will use this scrub). The Sugar is necessary because it's the base of the scrub to exfoliate your skin.
   After you sugar is inside the container, squeeze or pour your lemon juice, until every inch of your sugar is a pretty yellow, and then some. The lemon is necessary to bleach your acne scars. It's healthy and will leave a brilliant glow! Mix the sugar and lemon juice, it should be a thick paste. It shouldn't be runny.
   Olive Oil! Add a few drops, only a few! Alot is unnecessary and not recommended. The olive oil, works as an organic moisturizer that leaves the skin a healthy shine.
  Last, but not least, honey! When, i made my scrub i did not use honey, due to the fact there was none in my cabinet. But the usage of honey,can be important if you're looking for beautiful hydrating skin, it also prevents future breakouts!
    All you need to do now, is mix it all together and apply on your face. Gently, you don't want puffy blistering red skin! So apply gently and leave on for about 10 minutes! Here's the link if you found my D.I.Y tutorial in any way confusing  http://beautybanter.com/diy-lemon-and-sugar-body-face-scrub

 Removing the Lemon and Sugar Scrub from face
  In a microwave safe bowl heat up water and olive oilf for about 30 seconds, until comfortable warm, make sure it's steaming , though. Mix the oil with the water, Oil and water doesn't necessarily mix, so just spread out the oil. With a clean face towel did it in the oil and water and apply to face while removing the scrub :D